Hey there, DIY enthusiasts and comfort seekers! Welcome to your go-to guide for installing a mini split line set. If you're looking to enhance your home's climate control, you've probably heard about the wonders of mini split systems. These nifty devices offer both cooling and heating, promising year-round comfort with impressive efficiency. But, as with any great feat, the devil's in the details—or in this case, the line set.
This guide is your roadmap to a flawless installation, ensuring your mini split operates at its best. So, let's embark on this journey together, shall we?
The Importance of Precision in Installation
Imagine installing your mini split, only to find it underperforming or, worse, hiking up your energy bills due to a tiny, overlooked leak in the line set. It's like setting sail with a small hole in your boat; you might not notice it at first, but it's only a matter of time before you're bailing water.
A precise, leak-free installation is not just about immediate satisfaction; it's about securing a future of reliable, cost-effective comfort. That's why we emphasize precision from the get-go, ensuring your mini split system is a source of joy, not frustration.
Essential Tools for the Job
Before diving into the installation process, let's ensure your toolbox is equipped with the essentials. The right tools not only make the job smoother but also prevent common pitfalls that could lead to leaks or inefficiencies down the line.
-
Cutting Tools: A sharp, reliable pipe cutter is indispensable. It's your first step toward a clean installation, ensuring your copper tubing is cut cleanly and precisely.
-
Flaring Tools: The flaring tool is your key to creating perfect connections between the line set and the mini split units. A quality flaring tool ensures that the copper tubing flares evenly, preventing leaks at the connection points.
-
Deburring Tools: After cutting, the copper tubing can be left with sharp edges, known as burrs, which can compromise the integrity of your flare connections. A deburring tool or even a simple needle nose pliers can smooth out these edges, ensuring a perfect fit.

Image by DC Studio on Freepik
Step-by-Step Installation Guide
With your toolbox ready, let's walk through the installation process step by step. Patience and attention to detail are your best allies here.
Measuring and Cutting the Copper Tubing
First up, measure the distance between your indoor and outdoor units. This determines the length of copper tubing you'll need. Remember, it's better to have a little extra tubing than to come up short. Once measured, use your pipe cutter to make a clean, straight cut. This is where a quality cutter shines, leaving you with a smooth edge that's ready for the next step.
Deburring for a Smooth Finish
After cutting, the edges of the copper tubing can be rough. These burrs can cause leaks if left unaddressed. Use your deburring tool or the edge of your needle nose pliers to carefully remove these burrs, both inside and out. The goal is a smooth, clean edge that will seal perfectly when flared.
Mastering the Flare Technique
Flaring the copper tubing is where your installation can truly shine or falter. Place the tubing into the flaring tool, extending it just slightly beyond the tool's edge, according to the manufacturer's specifications. Then, tighten the tool to create the flare, ensuring it's even and without cracks. This step might take a few tries to perfect, but it's crucial for a leak-free system.

Image by master1305 on Freepik
Applying Nylog for a Perfect Seal
For an added layer of protection, apply a small amount of Nylog sealant on the flared ends. This helps ensure a perfect seal, preventing potential leaks and giving you peace of mind. A little goes a long way, so apply sparingly.
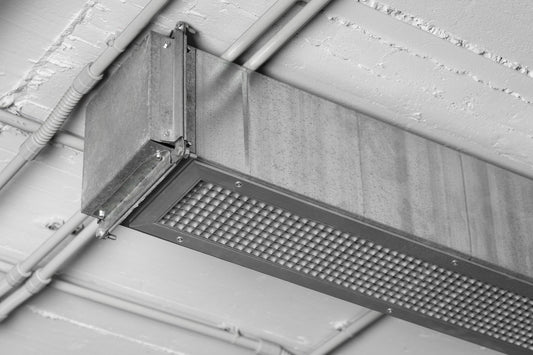
Routing and Bending the Line Set
Routing the line set from your indoor unit to the outdoor unit might seem like a straightforward task, but it's an art in itself. The key here is to maintain the integrity of the copper tubing while ensuring it follows the path of least resistance.
Avoid sharp bends at all costs, as these can kink the tubing, restricting the flow of refrigerant and compromising the efficiency of your system. Instead, aim for gentle curves. If you find yourself needing to make a tighter bend, consider using a tubing bender to prevent kinking.
Secure the line set with clamps every few feet to keep it in place and protect it from damage. Remember, the goal is a secure, efficient path that looks as good as it functions.
The Art of Torquing
Now, let's talk about torquing. This might sound like something reserved for car mechanics, but it's equally important in the world of mini split installations. Over-tightening can damage the copper tubing and fittings, leading to leaks and system failures.
Under-tightening, on the other hand, might not seal the connection properly, also leading to leaks. The sweet spot is achieved by using a torque wrench set to the manufacturer's specified settings. This tool provides a precise amount of torque, ensuring a perfect seal every time. It's a small investment that pays off in the longevity and efficiency of your mini split system.
Final Steps and Leak Testing
You're almost there! But before you start enjoying the comfort of your newly installed mini split system, there's one crucial step left: leak testing. This process involves evacuating the air from the line set and then checking for leaks. It's a critical step because even the smallest leak can significantly impact the efficiency of your system. You can use a vacuum pump to evacuate the air, and then a refrigerant leak detector to check for leaks.
Pay special attention to the flare connections, as these are the most common points for leaks. If you do find a leak, tighten the connection and test again. Once you're confident there are no leaks, you can proceed to release the refrigerant into the system.

Conclusion
Installing a mini split line set is a rewarding DIY project that can significantly enhance the comfort of your home. While it requires patience, precision, and the right tools, the effort is well worth it. By following this guide, you're well on your way to a successful installation.
Remember, the key to a leak-free, efficient system is in the details—measuring, cutting, flaring, and torquing with care. So take your time, follow the steps, and soon you'll be enjoying the perfect indoor climate, courtesy of your hard work.
FAQs
What's the best way to measure the length of copper tubing I need?
Measure the distance between your indoor and outdoor units, then add a few feet to account for bends and connections. It's better to have a bit extra than to be short.
Can I reuse the flare nuts that come with the copper tubing?
It's best to use the flare nuts provided with your mini split units, as they're specifically designed for a perfect fit and seal.
How often should I check my mini split system for leaks?
After the initial installation and leak test, it's a good idea to check your system at the beginning of each cooling or heating season.
What should I do if my flare connections keep leaking?
If you've retightened the connection and still have leaks, consider cutting off the flare and redoing it. Ensure you're using the correct flare size and applying Nylog sealant for a better seal.
Is it necessary to evacuate the air from the line set?
Absolutely. Evacuating the air and moisture from the line set is crucial for the efficiency and longevity of your mini split system. Skipping this step can lead to system damage and reduced performance.